Wednesday, June 22, 2011

Father's Day Card


This is a Father's Day Card that I made a couple of weeks ago.  One of my client's requested a card for her dad and this is what I whipped up.  All products are from Stampin' Up!  She loved the card sooooo much, that she wanted another!

Products:

Stamps:  Teeny Tiny Messages, Sail Away (Summer Mini)
Cardstock:  Crumb Cake, Brocade Blue (retired), Very Vanilla
Nautical Expedition DSP (from Summer Mini)
Accessories:  Build-a-Brad, 3/4" circle punch, Word Window punch, Modern Label punch, Watercolor Wonder Crayons, twine

You might also note that the picture is MUCH better than previous.  My new camera finally arrived.  I've done some experimenting.  So loving the DSLR.  Wish I had gotten one years ago.

Monday, May 16, 2011

Baby Announcement Bag Topper

Well, it seems as though there is a baby boom again amongst my friends.  Within the last year, many of them (including me) have given birth to our 2nd and 3rd babies.  I just love seeing all the pictures!  They are all one cuter than the next.  My next few posts will be dedicated to baby themed items. 

This past Friday some ladies from church came over to make 50 baby announcement bag toppers.  They had done something similar in the past so it made it much easier to put it all together.  This is what you will need:

All supplies are from Stampin' Up!

1. Top Note Die
2. Cardstock color of your choice (we used Pretty In Pink, Pink Pirouette and Whisper White)
3. Scallop Oval punch
4. Large oval punch
5. 1/4" white grosgrain ribbon
6. Early Espresso Classic Ink
7. Glue Dots
8. SNAIL adhesive
9. Big Shot die cutter
10. Small cello bags
11. Sticky Strip tape

I apologize for the horrible picture.  My camera died last week and this was resized from my phone.

Directions

1. Take the Pretty in Pink cardstock with the Top Note die and run through Big Shot
2. Fold in half.  Use a scoring blade to achieve a nice crease to fold.
3. Take the Pink Pirouette cardstock and punch with scallop oval
4. Take Early Espresso ink and stamp "it's a girl" onto Whisper white and punch using large oval punch
5. Make a bow with the ribbon and adhere using glue dot.
6. Layer and adhere ovals with SNAIL
7.  Take the cello bag and fill with whatever you want and adhere topper to bag with the sticky strip (this part is not shown).

My client was going to type up the baby's stats on a label and stick to the back of the topper to give. 
It took about 2 hours to make these with a 4 person assembly line.  Not to bad considering we made 50.


Thursday, April 21, 2011

Changes are coming. . .

Hi everyone!

Not sure if anyone stops by here anymore since I haven't updated since NOVEMBER.  Yikes!  Guess I got a little side tracked with a new baby, holidays, etc.  Well, the good news is that during this time I have been doing lots of thinking as to what the next step in my crafty pursuits should be.  I think I have come up with some good ideas.  Stay tuned, especially over the summer as I revamp the blog and hopefully become a blog that you will follow for ideas and inspiration :)

Wednesday, November 17, 2010

Join Stampin' Up! For 1/2 price!!

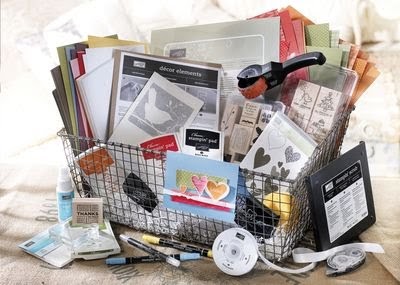
All this could be yours for just $87.50!  From now until November 30th you can become a Stampin' Up! Demonstrator for half-price.  Regular price is $175.

Enjoy 30% off of your first order of $150 or more in your first 45 days
Save 20% on all orders after that
Pre-order from the Occassions and Sale-a-Bration mini
Stampin' Success monthly magazine
Access to Stampin' Connection, a special website for demos only
Much more!!

There's no penalty to drop and you keep the kit and everything you purchased at a discount! You'll enjoy full demonstrator privileges thru March 31, 2011. To remain active beyond March 31, 2011, $300 in product sales is required and just $300 each quarter after that.


To take advantage of this awesome opportunity go here and click on "Start your own business" in the top right of the page.  Password:  luv2stamp09

Sunday, August 22, 2010

August Stamp Club Projects


This past Friday was our monthly stamp club meeting.  We had a wonderful time as always making some Halloween themed items.  As you can see in the picture above, we made 2 cards and 1, 3-D item.
As a special surprise, the ladies brought some special treats for my upcoming birthday.  Thanks!  That really made my day. 

Onto what you probably came to see are the supplies used in the above photo.

Card #1 (Left)
Stamps:  Wicked Cool
Paper:  Rich Razzleberry, Whisper White, Wicked Fun Specialty Designer Series Paper
Accessories:  Black embossing powder, dimensionals, scallop oval punch, large oval punch, rhinestones, In-color markers

Card #2 (Right)
Stamps:  Wicked Cool, Season of Friendship
Paper:  Old Olive, Whisper White
Ink:  Chocolate chip, Basic Black, Old olive, Pumpkin Pie
Heat embossing

Milk Carton
Sizzix BigShot Milk Carton die
Stamps:  Wicked Cool
Paper:  Old Olive, Pumpkin Pie, Whisper White
Ink: Basic Black
Accessories:  1/8" Taffeta ribbon black

Next month we will be making some Thanksgiving/Fall items.  Remember, if you are not part of the stamp club, you can always join us as a class.  In September I will also be adding and extra class or 2 plus some product shares.  Stay tuned!

Tuesday, June 29, 2010

Butterflies and flowers

Good Tuesday to you!  Today's card was originally made in Spring of 2009 for some workshops during the month of March.  It is one of my favorites so I decided it would part of class this month.  The ladies loved it!

I used the tall grass stamp from Inspired By Nature.  The flowers and two-step butterfly are from the Flight of the Butterfly stamp set.  The cardstock is Whisper White and Apricot Appeal (which is retiring).  Inks used were Regal Rose, Pink Pirouette and Apricot Appeal.   The Whisper White was cut with the Top Note die, my favorite! using the BigShot.  If you do not have a BigShot you really do need one.  It is so awesome!  Anyway, I also used the Butterfly Punch and popped the butterfly up on some dimensionals.  For a bit of bling I added the Certainly Celery Brads. 

Thanks for stopping by!

Monday, June 28, 2010

Yummy Ice Cream!

I'm back! In April I officially started my stamp classes again and I have a club ready to start in July, I am so excited! I have many cards to show you from classes and swaps. I hope you will come back often and be inspired.


Today's card is a birthday card which I CASed (copied in the stamp world). I am not sure who I "borrowed" the idea from, but thank you to whoever it was :)  We made this card last month during the card ministry I started at church and at my June class.  Enjoy!


 The Details:
Stamps  Sweet Scoops (Summer Mini)
Cardstock  Whisper White, Pretty in Pink, Close to Cocoa
Ink Pretty in Pink, Pink Pirouette, Cloe to Cocoa